Ordering a Product
(Avenue Book Example)
1. Click On Start Ordering
After logging in on the Home Page, click on the Start Ordering tab in the navigation header.
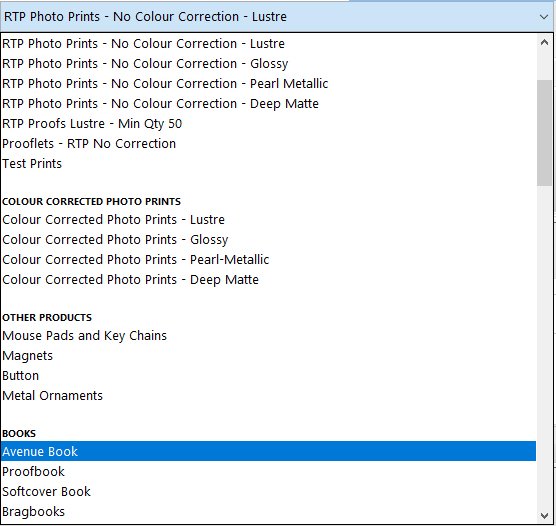
2. Product Menu
Under the Product Menu, choose a product to order.
3. Product Tab
Once you’ve chosen your product, you’ll notice several options depending on the item. Here you are presented with tabs that allow you to fully customize your items, add logos, engrave or laser names, add supplementary products, and much more. Some tabs will even include more information about the product and how to utilize all of the customization. Click through the tabs until you find the templates for your products. Once you find the template you’d like to use, double click to add it to your workflow window- where you will now begin to work on your product.

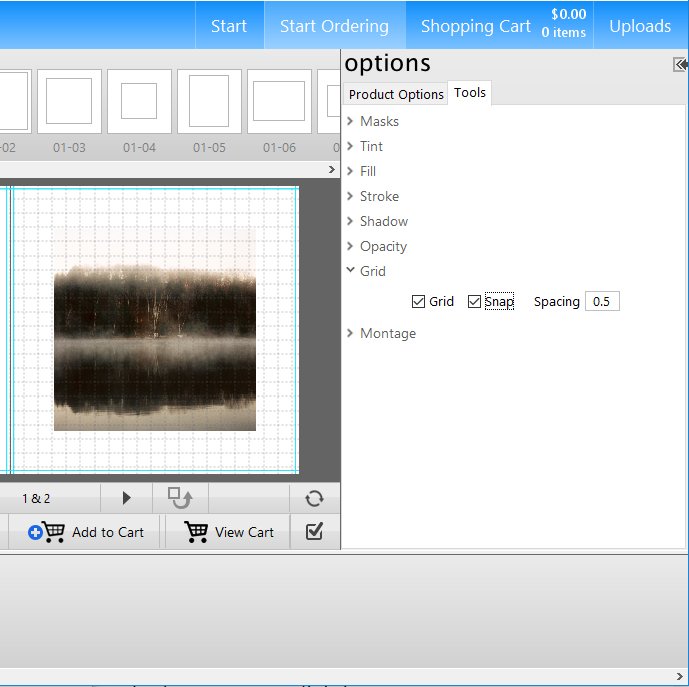
4. Options Window
On the right hand side of your screen you will notice your options window. Here you can begin to choose the look and feel of your product. You can choose the type of paper you want to print on, cover material, engraving and laser options, and so much more! Under the tools section you will find more tools to help you edit and customize the look of your product- such as adding a grid and snap feature to help with image placement.

5. Working On Your Product (Avenue Book)
Now that you’ve added your template and chosen some material options, let’s get started on adding some images. You’ll want to make sure that you’ve populated the image viewer with images that you would like to include- see Adding Images PDF for more details. From here you can drag and drop your images on to the template in the middle of your screen.
Choose the back arrow button underneath the template when designing an album or book cover to view both the front and back at the same time- this is helpful when you want a picture to span both covers.
If creating a book, use the arrow buttons to move through your pages. You may use a variety of templates throughout your product by dragging them to each new page. Other products use templates as well; just drag the appropriate template to your workflow.


Alternatively, you can download the templates from our website and design your product in Photoshop.
Sometimes the templates aren’t exactly what we envision, but we can customize those within ROES too! Using the Edit Tool (located just under the hand), you can change the shapes of the image nodes within a template- using the grid and snap functions located in the Tools section under Options makes this much easier!
You can also adjust the images you drag and drop into these nodes with the tools that hover over said image. Available tools will enlarge the image to fill the node/ space, adjust the image to its native dimensions, and rotate your image.

6. Ordering
Once you’ve finished designing your product, click ‘Add To Cart’ on the bottom of your screen.
Click on the ‘Shopping Cart’ tab to review and finalize your order.
Review the items placed in your cart to ensure all is correct. Make sure to click the render button so that you may properly inspect your work before sending it to be printed- do not trust the small thumbnails in
your cart. Save your rendered files.
Next you will complete the ordering process using the Options panel on the right of
your screen.
Click and confirm that you have reviewed your order.
You will find the turn around time located here for your records.
Record any special notes you have about your product.
Ordering a few things?
Combine up to 3 ROES orders to be shipped together and save on shipping costs!
Be sure to give your order a Job Name. Now you may click the ‘Complete and Send Order’ button to finish your order.